Blog
Running Alluxio with Docker and S3 on DCOS/Mesos/Marathon
At Koddi we're always looking for ways to increase the speed and stability of our platform. One of our latest projects is speeding up our daily ingestion of data. All of our data is initially stored in flat files on S3 before being loaded into our database. We're currently in the process of integrating Apache Spark into our load process to drastically increase the speed of our loads. One problem we ran into is that S3 doesn't behave like a normal file system in terms of read and write speeds. This is where Alluxio comes in. Alluxio is a "memory speed virtual distributed storage system" which lies between frameworks (such as Spark, MapReduce, Flink, etc.) and a storage system (Amazon S3, Google Cloud Storage, HDFS, Ceph, etc.). This allows for dramatically faster data access, with some users seeing a 30x increase in data throughput. For a more in-depth overview of Alluxio, see their documentation.
By Spencer Smith
At Koddi we’re always looking for ways to increase the speed and stability of our platform. One of our latest projects is speeding up our daily ingestion of data. All of our data is initially stored in flat files on S3 before being loaded into our database. We’re currently in the process of integrating Apache Spark into our load process to drastically increase the speed of our loads. One problem we ran into is that S3 doesn’t behave like a normal file system in terms of read and write speeds. This is where Alluxio comes in. Alluxio is a “memory speed virtual distributed storage system” which lies between frameworks (such as Spark, MapReduce, Flink, etc.) and a storage system (Amazon S3, Google Cloud Storage, HDFS, Ceph, etc.). This allows for dramatically faster data access, with some users seeing a 30x increase in data throughput. For a more in-depth overview of Alluxio, see their documentation. Now that we have our Alluxio cluster up and running, we wanted to share a guide on the process of integrating it with DCOS/Mesos/Marathon. This tutorial assumes that you already have a similar cluster up and running.
Preparing a Marathon Application
Marathon applications are created using Docker images. User ajmssc created a repo that dockerizes the Alluxio cluster. We forked his repo and made a few changes to allow it to work with Marathon. You can find our forked repo here. We’ve also uploaded it to Docker Hub here. (docker pull koddidev/alluxio) So we now have a dockerized Alluxio container ready to go. We’ll now need to create a Marathon Application Definition. This is where we’ll set all the options for our application (including docker options, environment variables, port numbers, etc.) Fortunately, we can use ajmssc‘s docker-compose file to get the docker config options. To do this, we used an awesome command line tool from micahhausler called container-transform. This tool allows you to take container configuration files (Kubernetes, ECS, Docker-compose, Marathon, or Chronos) and convert them to another type. For example, you can run container-transform -i compose -o marathon alluxio-docker.yml > alluxio-marathon to transform the docker-compose file to a json file for use with Marathon. Our full Marathon definition files (master and worker) can be found in a Gist here. Download these and customize them to fit your specific needs. Pay special attention to the AWS keys, S3 path and internal marathon load balancer address in the environment variable section.
Creating and Deploying the Application
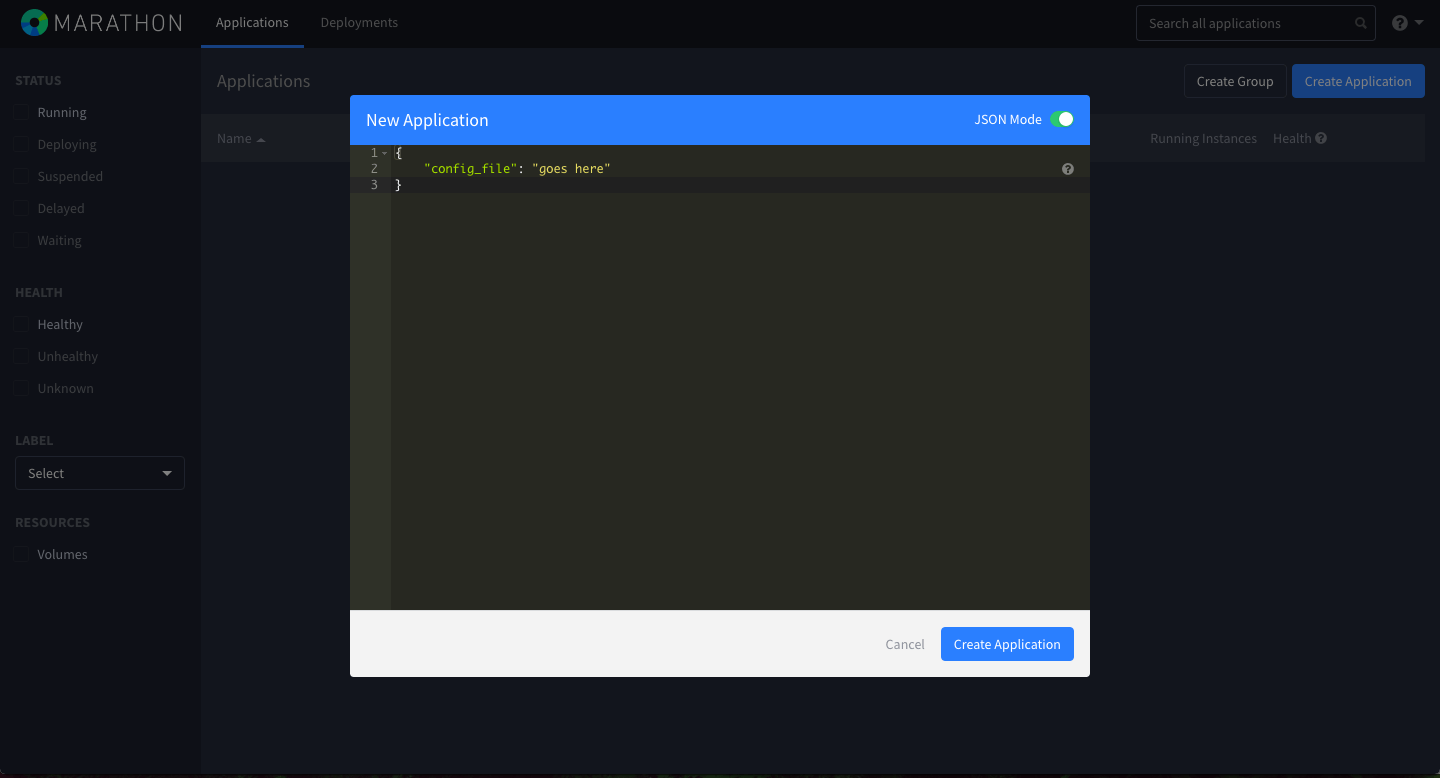
So now we have everything we need to create our Marathon application. Login to your Marathon dashboard and create a new application and switch to JSON Mode. Paste in the alluxio-master config file and select create application.
Repeat this process for the alluxio-worker application and you should see your two applications running and everything should be good to go!

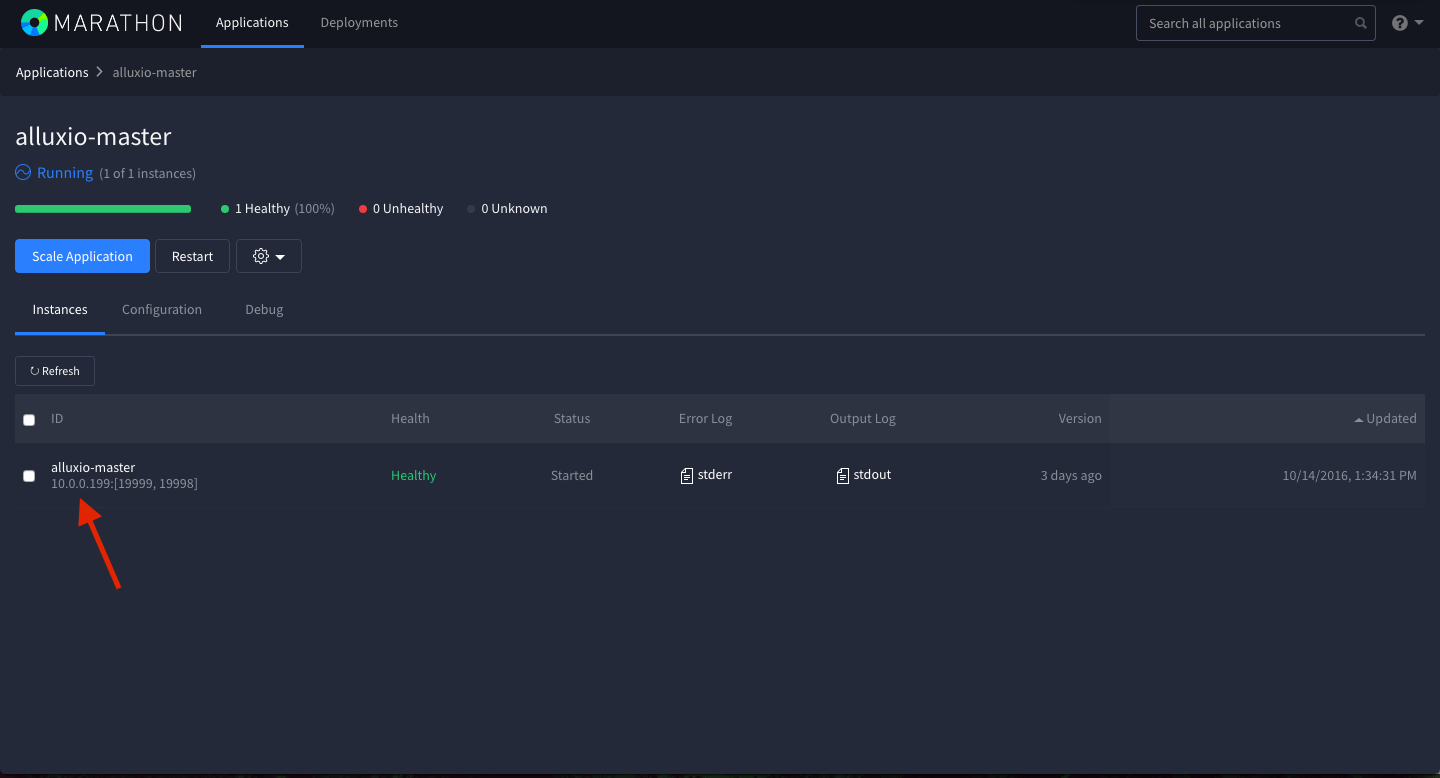
You can verify that everything is working by running the automated tests on the Alluxio master node. To do this, you’ll need the internal IP addresses of the instance the master is hosted on. Click on the application name you’ll see the IP address in the ID column. (See image below.)

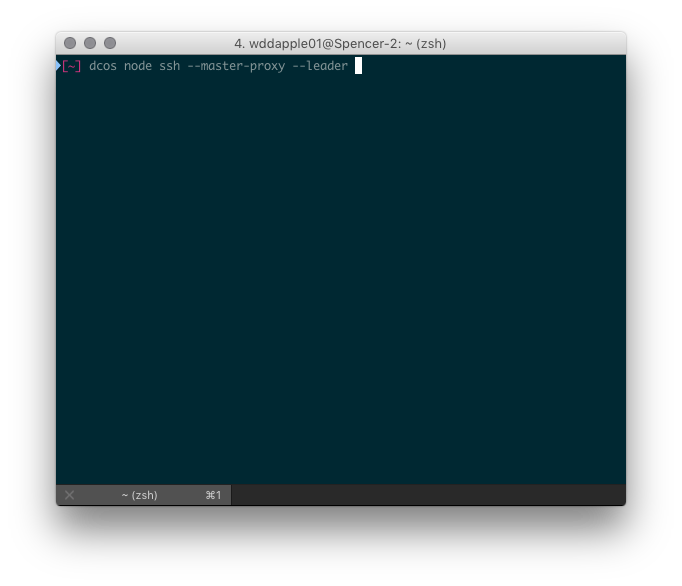
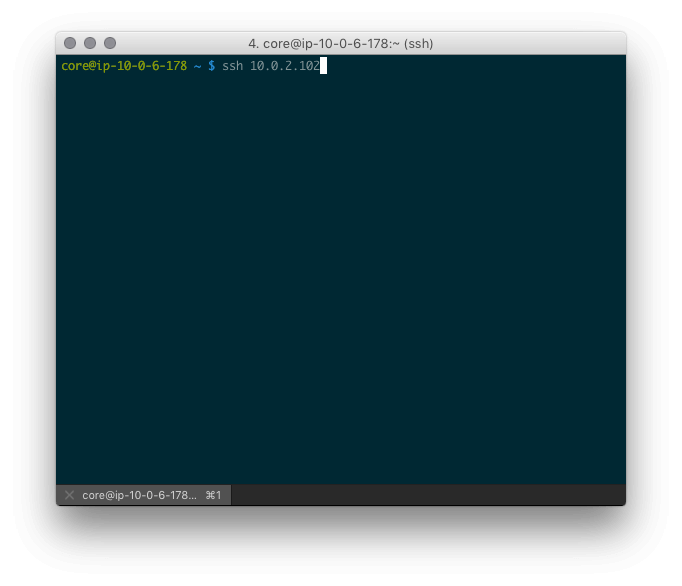
Log into dcos via the command line (dcos node ssh --master-proxy --leader) and ssh into the alluxio-master instance.
Run docker ps to get the “Container ID” and use it to log into the alluxio-master docker instance. (docker exec -ti [container_id] bash) From here, run /alluxio/bin/alluxio runTests to test that everything is working. Were you able to get it to work? Need help with an error? Let us know in the comments below!
UPDATE:
Previously, we had some limitations regarding the number of workers you could have, as well as needing to manually add the docker container ID of the worker to the master node’s hosts file. Fortunately, we have been able to fix these by setting the alluxio.worker.hostname, alluxio.worker.port and alluxio.worker.data.port in the alluxio-site.properties file via the cmd block in the worker node’s Marathon definition file. Example: cp /alluxio/conf/alluxio-site.properties.template /alluxio/conf/alluxio-site.properties echo 'alluxio.worker.hostname=MARATHON-INTERNAL-LOAD-BALANCER.us-east-1.elb.amazonaws.com' >> /alluxio/conf/alluxio-site.properties echo 'alluxio.worker.port=10105' >> /alluxio/conf/alluxio-site.properties echo 'alluxio.worker.data.port=10103' >> /alluxio/conf/alluxio-site.properties Note: the port numbers here aren’t specific, you can use any that work for your setup.
You may be interested in
GET IN TOUCH
Ready to get started?
Don’t let your brand get lost in the noise. Partner with Koddi to unlock the power of commerce media and transform the way you engage with your customers. Our team of experts is here to help you navigate complexities and develop a strategy that drives results — no matter what industry – in as little as 45 days.